Deliver to
France
£
change
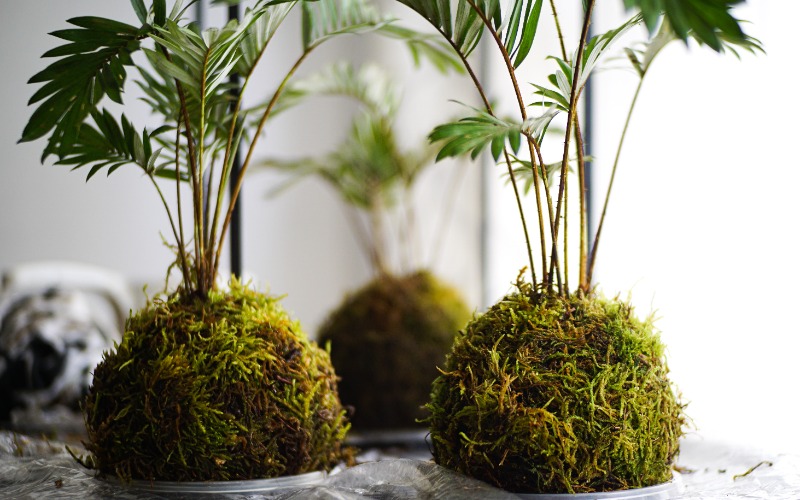
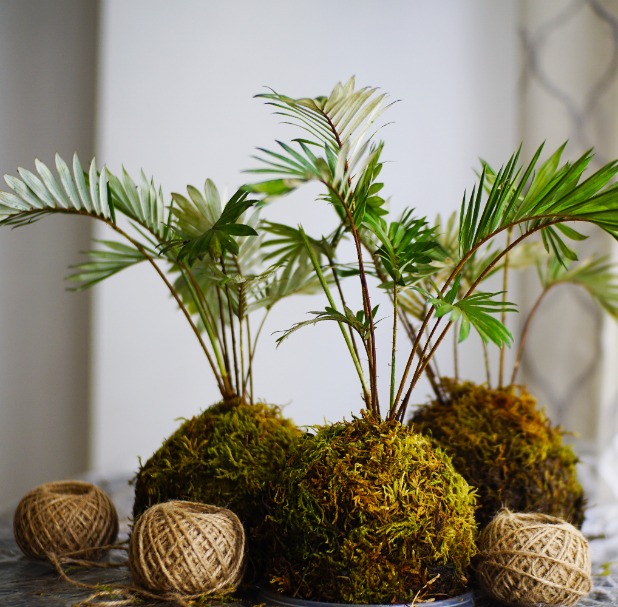
Kokedama, literally translated as 'moss ball' in Japanese, is a green plant concept. A Kokedama is a small amount of soil covered with moss, in which a small plant or cutting grows. The beauty of a Kokedama lies in its simple care requirements, making a traditional flower pot unnecessary. Easy and quite enjoyable to make. Let's get started!
A Kokedama is a plant that allows its roots to grow within a ball of soil and moss, creating a unique and captivating sight. In contrast, plants in a Kokodama don’t grow in a ball but rather in a casing of coconut fibres. These coconut fibres serve as pots, primarily intended for hanging plants. Understanding this distinction between the two plant styles is essential. Good to know the difference!
Supplies
Moss
Tropical plant
Potting soil
Bucket or large container
Wire, thread, or twine
Scissors
Watering can
Plant mister
Take a bucket or plastic container and fill it with a generous layer of potting soil.
Moisten the potting soil by adding a little water. It's important to carefully add small amounts of water to achieve the right balance.
Then, take enough sticky potting soil and form it into a ball.
If the potting soil is too dry, you can add extra water. Ensure the ball is large enough for the roots of the plant and to be covered with moss.
Gently press a hole in the middle of the ball with your finger. This is where the plant will be placed. Ensure there is enough room for the roots.
Place the cutting or plant into the prepared hole, then firmly close the ball.
Cover the outer surface of the ball with moss. If the moss keeps falling apart, you can moisten it with a plant mister to help shape it better.
Attach the moss to the ball using wire, thread, or twine. Be careful not to make it too tight to avoid constricting the moss.
Mist both the plant and the moss with the plant mister. That’s it!
After a few weeks, you can carefully snip away the twine around the moss. The moss should be adequately rooted to remain attached to the ball. Of course, you can choose to leave the twine in place if you prefer.
Like any other houseplant, the plant in the Kokedama also needs water. Water the Kokedama every week by spraying around the moss ball with a plant mister. Do this for both the plant's leaves and the moss. There is nothing more to it! No plant nutrition, nothing.
Regarding placement, you can stick to the plant's preferred spot. However, direct sunlight may cause parts of the moss to discolour or even burn. If you intend to move the Kokedama to a brighter location, do so gradually. Move the Kokedama a little closer to the new location every few days to allow it to acclimate to the intense light gradually. This prevents damage to the moss.
It's crucial to choose the right plant for your kokedama. Plants that thrive in moist conditions and don't grow too quickly are usually the most suitable. Some popular choices include:
You can use various types of moss for your kokedama, such as sphagnum moss, peat moss, or even flat moss. Each type of moss has its own aesthetic and functional advantages, so it may be worth experimenting with different types to see which works best for your kokedama.
Over time, the plant may outgrow the kokedama. If this happens, you can carefully dismantle the kokedama and replant the plant in fresh potting soil and moss. You can repeat this process every few years to maintain the plant's health.